
Can you bandage a cat’s paw at home? Yes, you can bandage a cat’s paw at home in many situations, especially for minor injuries, but it’s always best to consult a veterinarian first. A proper bandage is crucial for cat paw wound care and helps prevent infection, reduce swelling, and protect the injured area. This guide will walk you through the process of applying a bandage to a cat’s foot to help with cat foot injury treatment, ensuring you know how to wrap a cat’s paw effectively. Remember, this is for temporary or minor situations, and professional veterinary advice is paramount for any serious injury.
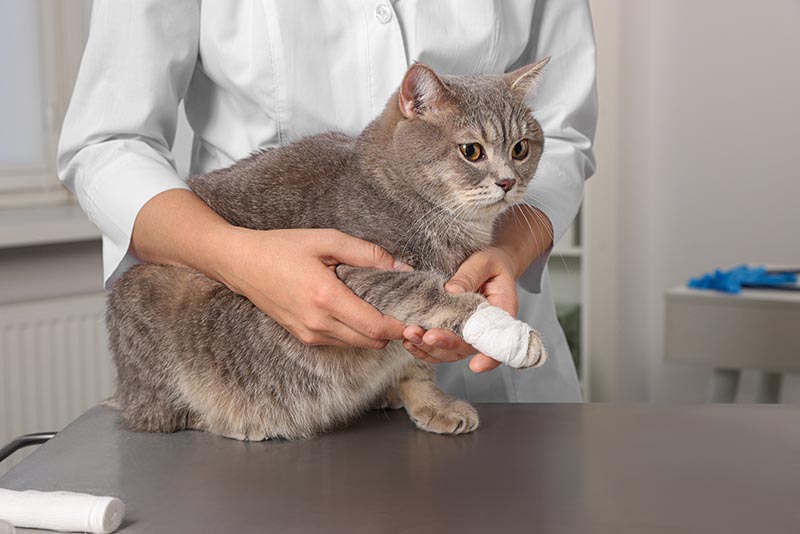
Image Source: www.hepper.com
Preparing for Your Cat’s Paw Bandage
Before you begin how to bandage cat paw, gathering the right supplies is essential for a successful and safe application. Having everything ready will make the process smoother for both you and your feline friend.
Essential Supplies for a DIY Cat Paw Bandage
- Gauze Pads: Sterile gauze pads are needed to cover the wound directly. Choose non-stick pads if possible to prevent them from adhering to the injury.
- Roller Gauze (Conforming Bandage): This is used to wrap around the gauze pads and provide light support.
- Vet Wrap (Cohesive Bandage): This self-adhering bandage is ideal as it sticks to itself but not to fur or skin, making applying a bandage to a cat’s foot much easier and secure. It comes in various colors and widths.
- Medical Tape: Hypoallergenic medical tape can be used to further secure the bandage, especially the end of the vet wrap.
- Antiseptic Solution: A pet-safe antiseptic solution (like diluted chlorhexidine or Betadine) to clean the wound. Avoid alcohol or hydrogen peroxide as they can damage healing tissue.
- Scissors: Clean, sharp scissors for cutting the bandages.
- Gloves: Disposable gloves to maintain hygiene.
- Towel or Blanket: To help gently restrain your cat.
- A Helper (Optional but Recommended): An extra pair of hands can be invaluable for keeping your cat calm and still.
Ensuring a Safe Environment for Bandaging
Creating a calm and quiet environment is key to minimizing stress for your cat.
- Choose a Quiet Room: Select a room where your cat feels safe and where there are minimal distractions.
- Dim Lighting: Soft lighting can help your cat relax.
- Comfortable Surface: Have a soft surface like a bed or blanket for your cat to lie on.
- Positive Reinforcement: Have some of your cat’s favorite treats ready for after the procedure.
Step-by-Step Guide to Bandaging Your Cat’s Paw
Following these steps carefully will help you apply a secure and effective bandage for your cat’s injured paw. The goal is to provide protection and support without causing discomfort or restricting circulation.
Step 1: Assess the Injury and Clean the Wound
The first and most critical step is to safely assess the injury and clean it thoroughly.
1.1 Safely Restrain Your Cat
Cats can be unpredictable when injured or handled against their will.
- Gentle but Firm Handling: Speak in a calm, soothing voice.
- Use a Towel: Wrap your cat loosely in a towel or blanket, leaving only the injured paw exposed. This can prevent scratching and biting.
- Seek Assistance: If your cat is particularly resistant, have a trusted friend or family member help you gently hold your cat.
1.2 Examine the Paw
Once your cat is reasonably still, carefully examine the paw.
- Look for Foreign Objects: Check for splinters, glass, or other debris embedded in the wound.
- Assess Bleeding: Note the amount of bleeding. Minor oozing is expected, but heavy bleeding requires immediate veterinary attention.
- Identify Lacerations or Punctures: Look for cuts, scrapes, or puncture wounds.
- Check for Swelling or Deformity: Significant swelling or an unusual shape might indicate a fracture or sprain.
1.3 Clean the Wound
Proper cleaning is vital to prevent infection.
- Wash Your Hands: Always wash your hands thoroughly with soap and water before and after.
- Use Antiseptic Solution: Gently clean the wound area with a pet-safe antiseptic solution and a clean cloth or cotton balls.
- Avoid Rubbing: Dab or blot the area gently. Do not rub vigorously, as this can irritate the wound.
- Remove Debris: If you find small, loose debris, you can try to gently remove it with clean tweezers. However, if debris is deeply embedded, leave it for a veterinarian.
- Pat Dry: Gently pat the area dry with a clean gauze pad.
Step 2: Apply Sterile Gauze Pads
These pads act as a primary dressing to absorb exudate and protect the wound.
2.1 Place the Gauze
- Cover the Entire Wound: Place one or more sterile gauze pads directly over the cleaned wound. Ensure the entire injured area is covered.
- Multiple Layers if Needed: For larger wounds or significant oozing, you may need to stack a few gauze pads.
Step 3: Wrap with Roller Gauze
This layer provides initial padding and support.
3.1 Gentle Wrapping Technique
- Start Below the Paw: Begin wrapping the roller gauze a few inches below the paw, on the healthy part of the leg.
- Move Upwards: Gently and evenly wrap the gauze up the leg, covering the paw and the gauze pads.
- Overlap by Half: Each layer of gauze should overlap the previous one by about half its width.
- Avoid Tightness: The bandage should be snug but not tight. You should be able to slip a finger comfortably between the bandage and your cat’s leg.
- Crucial: Check Circulation: Too tight a bandage can cut off circulation, which is a serious concern.
Step 4: Secure with Vet Wrap (Cohesive Bandage)
This is the final layer that holds everything in place.
4.1 Applying the Vet Wrap
- Start Below the Roller Gauze: Begin applying the vet wrap a little below where the roller gauze started.
- Smooth and Even Application: Wrap the vet wrap smoothly and evenly up the leg, covering the roller gauze.
- Maintain Consistent Tension: Apply consistent, gentle tension. Avoid pulling too tightly.
- Overlap by Half: Again, overlap each layer by about half.
- Secure the End: Once you reach the top of the roller gauze, or a comfortable distance up the leg, tear or cut the vet wrap and press the end firmly onto itself to secure it. It should stick well without needing tape.
4.2 Securing the Cat Paw Bandage
While vet wrap is self-adhesive, sometimes an extra measure can be helpful.
- Use Medical Tape (Optional): If you feel the vet wrap might unravel, you can use a small piece of hypoallergenic medical tape to secure the very end of the vet wrap. Ensure the tape adheres to the vet wrap, not directly to the fur.
Step 5: Final Checks and Monitoring
After the bandage is applied, it’s crucial to perform a few final checks.
5.1 Circulation Check (Most Important!)
This is paramount for feline paw bandage instructions.
- “Toe Twitch” Test: Gently touch your cat’s toes. They should be able to wiggle them slightly.
- Temperature: The toes should not feel cold or numb. Compare them to the toes on the uninjured paw.
- Swelling Above/Below: Look for any signs of swelling developing above or below the bandage.
- Color: The toes should remain pink. Blue or white toes are a sign of restricted blood flow and require immediate removal of the bandage and veterinary attention.
5.2 Comfort Level
- Watch for Licking/Chewing: If your cat immediately starts trying to chew or lick the bandage off, it might be too loose, too tight, or uncomfortable.
5.3 Keeping the Bandage Dry
- Protect from Moisture: The bandage must be kept clean and dry. This is crucial for preventing infection and maintaining the integrity of the dressing.
Important Considerations for Cat Paw Bandage Care
Once the DIY cat paw bandage is applied, ongoing care and monitoring are essential for successful cat paw wound care.
Preventing Your Cat from Removing the Bandage
Most cats will try to remove a bandage if they find it bothersome.
- Cone of Shame (E-Collar): The most effective method is to prevent your cat from accessing the bandage with its mouth. An Elizabethan collar (e-collar) is usually necessary.
- Distraction: Sometimes, toys or interactive play can distract your cat from the bandage, but this is less reliable.
- Bitter Sprays: Some pet owners use bitter-tasting sprays on the bandage, but this can also be unappealing to the cat and may not deter all cats.
Keeping the Bandage Dry and Clean
Moisture is the enemy of a good bandage.
- Protective Booties: When your cat needs to go outside, or even walk on potentially damp surfaces indoors, cover the bandage with a waterproof bootie or a plastic bag secured loosely with tape. Never tie anything tightly around the leg.
- Change if Wet: If the bandage becomes wet or soiled, it must be replaced immediately.
When to Seek Veterinary Care
This guide is for minor injuries or as a temporary measure. Always consult a veterinarian for:
- Deep Wounds: Lacerations that are deep, gaping, or won’t stop bleeding.
- Puncture Wounds: These can easily become infected.
- Broken Bones or Severe Sprains: If you suspect a fracture or significant soft tissue damage.
- Signs of Infection: Redness, swelling, pus, foul odor, or increased pain.
- Your Cat’s Distress: If your cat is in significant pain, lethargic, or showing signs of shock.
- If the Bandage Fails: If the bandage slips, loosens, or your cat removes it and re-injures the paw.
- Long-Term Bandaging Needs: For extended treatment, a veterinary professional should manage the bandaging.
Table: Bandage Layers and Their Purpose
| Layer | Material | Purpose | Key Considerations |
|---|---|---|---|
| Primary Dressing | Sterile Gauze Pads | Absorb exudate, protect wound, provide a clean surface for subsequent layers. | Non-stick preferred, cover wound completely. |
| Secondary Layer | Roller Gauze | Provides padding, support, and holds primary dressing in place. | Even tension, not too tight, overlap by half. |
| Tertiary Layer | Vet Wrap (Cohesive Bandage) | Secures all layers, provides compression and support, adheres to itself. | Even tension, not too tight, overlap by half, self-adhering. |
| Optional Security | Medical Tape | Adds extra security to the end of the vet wrap if needed. | Hypoallergenic, adheres to vet wrap only, not fur. |
| Protection | Waterproof Bootie/Bag | Keeps bandage dry and clean when exposed to moisture or ground contact. | Loosely secured, not tight, removed after exposure. |
FAQ: Common Questions About Bandaging a Cat’s Paw
How long should a cat’s paw bandage stay on?
A veterinarian will determine the duration for which a bandage should remain on your cat’s paw. Typically, for minor injuries, it might be a few days, requiring changes every 24-48 hours or sooner if it becomes wet or soiled. For more severe conditions, a vet will manage the bandaging schedule. Never leave a bandage on longer than recommended by your vet.
Can my cat walk with a bandaged paw?
Your cat may attempt to walk with a bandaged paw. However, their gait will likely be altered. It’s important to limit their activity to prevent the bandage from becoming soiled, wet, or dislodged, and to allow the paw to heal. Confining your cat to a small, safe area with easy access to food, water, and a litter box is often recommended.
What if my cat chews the bandage off?
If your cat chews the bandage off, it needs to be reapplied if necessary, or you’ll need to prevent access. This usually means using an Elizabethan collar (e-collar or “cone of shame”). If the paw is re-injured or appears worse, contact your veterinarian immediately.
How do I know if the bandage is too tight?
Signs that a bandage is too tight include:
* Swelling of the toes or paw above or below the bandage.
* Coldness of the toes.
* Your cat constantly licking or chewing at the bandage (though they may do this if it’s too loose or uncomfortable too).
* A foul odor or discharge seeping through the bandage.
* Your cat refusing to put any weight on the paw at all, which is different from their usual discomfort.
If you suspect the bandage is too tight, carefully remove it and contact your veterinarian immediately.
Can I use human bandages on my cat?
While some human bandages might seem similar, it’s generally best to use pet-specific or veterinary-approved bandages. Human bandages may contain adhesives that are too strong or irritating for a cat’s skin and fur. Vet wrap, designed for animals, is the preferred choice due to its self-adhering nature and gentleness on fur.
What is considered a minor injury that I can bandage myself?
Minor injuries typically include small cuts, scrapes, or abrasions that are not actively bleeding profusely and do not show signs of deep tissue damage or infection. However, what seems minor to an owner can sometimes be more serious. It is always safest to have a veterinarian assess the injury first. This guide is for temporary measures or situations where immediate veterinary care is not accessible, but a vet consultation should follow as soon as possible.
How do I wrap a cat’s paw for a temporary fix?
For a temporary fix, follow the steps outlined above: clean the wound with a pet-safe antiseptic, cover it with sterile gauze, and then use vet wrap or conforming gauze to secure it snugly but not too tightly. Ensure you can still get two fingers under the bandage. If the injury looks serious, it’s not a “temporary fix” situation, and veterinary care is essential.
How often should I change the bandage?
The frequency of bandage changes depends on the wound and the type of bandage. For a veterinary paw dressing, your vet will give specific instructions. Generally, for a DIY cat paw bandage, you should check it daily and change it if it becomes wet, dirty, or shows signs of leakage or odor. Otherwise, if it remains clean and dry, changes may be less frequent, but consult your vet.
What are the risks of bandaging a cat’s paw incorrectly?
Incorrect bandaging can lead to several serious problems, including:
* Circulatory Impairment: A bandage applied too tightly can cut off blood flow, leading to tissue damage or even amputation.
* Infection: If the bandage is not clean or becomes wet and dirty, it can promote bacterial growth and lead to infection.
* Pressure Sores: A poorly applied bandage can create pressure points, leading to sores.
* Nerve Damage: Tight bandaging can sometimes damage nerves.
* Increased Pain and Stress: An uncomfortable or ineffective bandage can cause your cat significant pain and stress.
* Dislodgement: A loose bandage won’t protect the paw and could become a tripping hazard.
This underscores the importance of feline paw bandage instructions and veterinary guidance when protecting a cat’s injured paw.